Having a signature on your outgoing email is a great way to ensure that people always have your contact details or other information to hand so in this tip we'll show you how to set up a signature on a few different devices.
iOS
To set up a signature on your iPhone or iPad, first tap on the Settings icon.

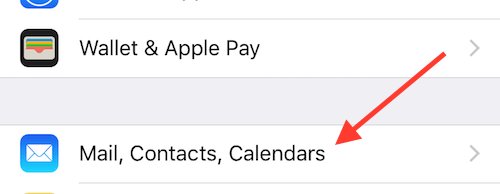
Now scroll down and tap on Mail, Contacts, Calendars.
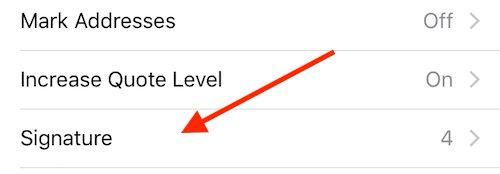
Then scroll down and tap on Signature.
You now will have the option of having one signature for all your email accounts or having a different signature for every account. You can type (or copy and paste) in your signature(s) and then whenever you compose a new email, your signature will be at the bottom of the email for you.
macOS
In Apple Mail,the first step is to open Preferences from the Mail menu, and then click on the Signatures tab.

You'll now see three columns, the first column shows your email accounts, the middle column lists all the signatures and the third column is where you type in your signature text. Click on the + icon at the bottom of the middle column and then type in your text in the third column.

When you've written your signature, you then just drag and drop the signature from the middle column onto the email account you want to assign it to. Now when you create an email in that account, you can add the signature in. If you use the 'Choose Signature' pop up list to pick the signature you've just created, it will automatically be on the bottom of all your new emails sent from that account.
Windows 10
In Outlook, you can create a signature for your emails with the following steps;
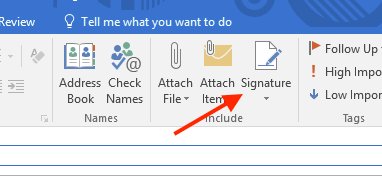
Compose a new email and then click on the Signature icon in the ribbon.
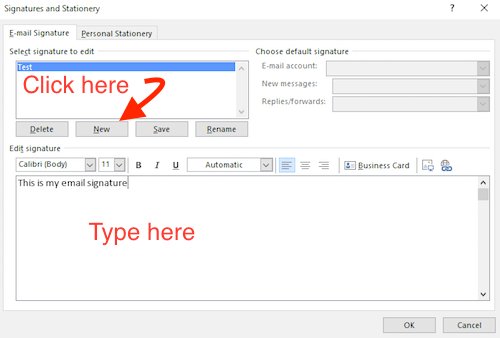
You'll now see the Signatures and Stationery window. You just need to click on the New button under the list of signatures, give your signature a name and type in the signature you'd like into the box.
You can now choose which email account to attach this signature to from the options at the top right of the window. You can also tell Outlook whether it should put your signature on new emails and/or replies and forwards. Once you have set the options you prefer, just click OK and you're done.
Windows 10 Mail
Windows Mail only has very limited options for a signature, but you can still set one up using the instructions below;
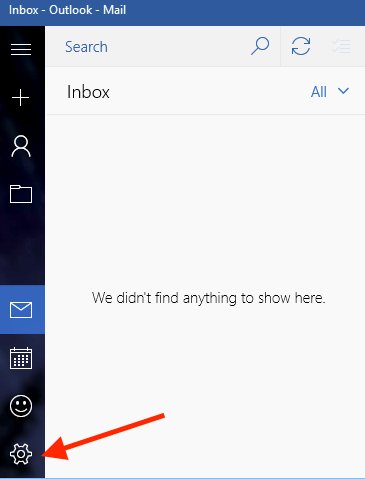
Firstly, click on the Settings icon in Windows Mail.
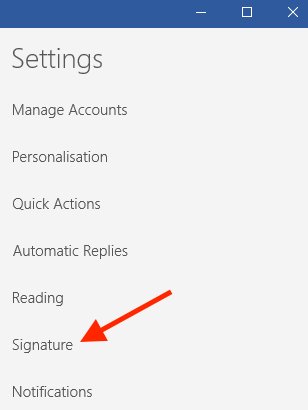
Now the settings window should appear on the opposite side of the Mail window, click on Signature.
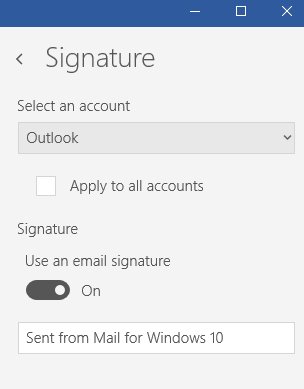
You can now type in a short signature and decide whether you want to apply it to all accounts or just to one specific account.
To ensure that your emails avoid as many junk filters as possible, it's best to only use text for your email signature. Large signatures that contain pictures and logos not only make your emails many times larger but also much more likely to get filtered out as spam.