Very prompt service and extremely efficient.
The staff are very friendly, easy to converse with when one is computer-illiterate, no feeling of being patronised for lack of computer/IT knowledge/skills. I would recommend this company fully for their professionalism, knowledge and experience.
Setting up a complete backup on the latest versions of Windows and macOS is very easy and we'll show you how to do it below.
The first step is to get an empty USB external drive, any USB 3.0 external drive is fine for this and you can get one from Amazon here - http://amzn.eu/iBJCiuG
Windows 10
When you first plug your new drive into your PC, you'll see a message at the bottom right of the screen asking if you'd like to configure what happens with the drive, click on this message.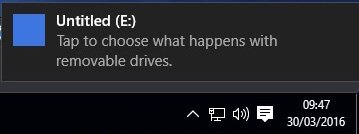
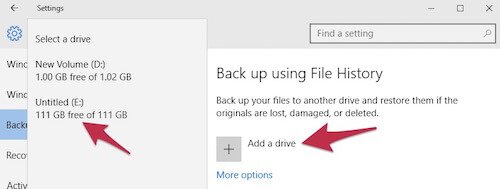
You will now be presented with various options, click on the top option to Configure this drive for backup.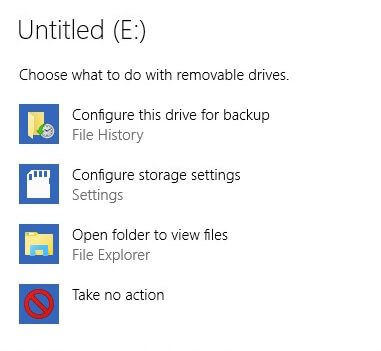 The Backup settings will now appear on the screen and all you need to do is click on the Add a drive button and then choose the new drive that you just plugged in. If you have more than one drive connected, please ensure that you pick the correct drive, in this example, it's the E drive.
You'll now see that the Automatically back up my files option is switched on and Windows has already started to copy your files to the new disk. If you leave the drive plugged in as much as you can, your backup will always be up to date.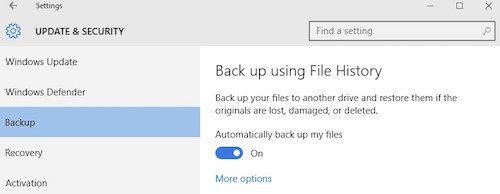
If you don't see a message pop up when you first plug in the drive, you can set up the backup manually instead and to do that, just follow the steps below, click on the Start button at the bottom left of the screen and then click on the Settings icon.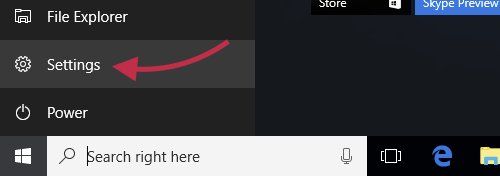
Once the Settings window has opened, click on Update and Security button.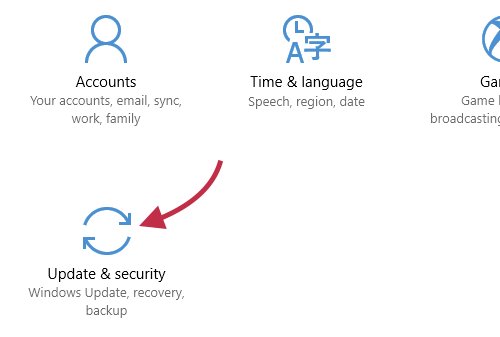 Now click on the Backup option on the left hand side of the Update & security window and you can select your backup drive, as above.
Mac OS
When you plug your new backup drive into your Mac, you should see the following window pop up and ask you if you want to use the drive as a Time Machine backup disk. Simply click on Use as Backup Disk and the Mac will prepare the disk and start backing up for you.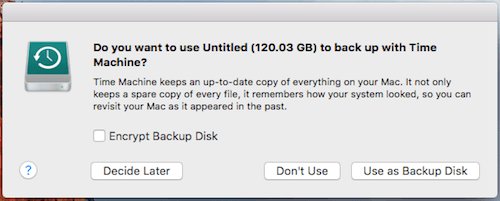
Once your backup is running, you can easily check the progress or the time of the last backup by clicking on the Time Machine icon in the menubar at the top of the screen. If you want to run a manual backup just click on Back Up Now, otherwise the Mac will back itself up every hour as long as the backup drive is plugged in.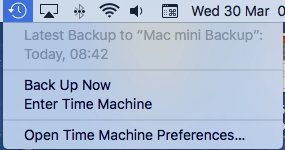
If your Mac doesn't ask you if you want to backup, you can easily set it up manually using the steps below. First, click on the Apple menu at the top left of the screen and then click on System Preferences.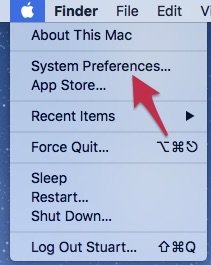
Once the System Preferences window opens, click on Time Machine.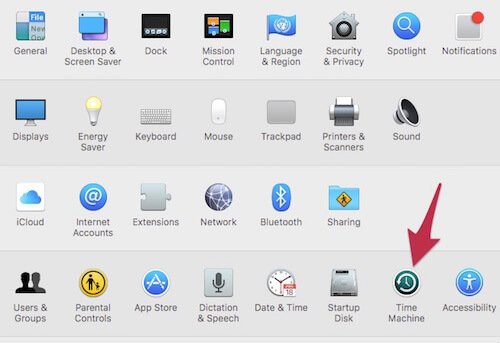
Now that you're in the Time Machine preferences, click on Select Disk.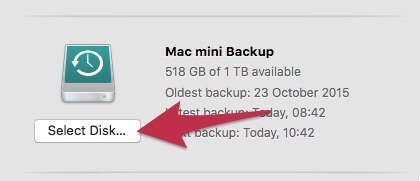
Now choose the new USB drive that you've plugged in ('Untitled' in this example) and click on Use Disk.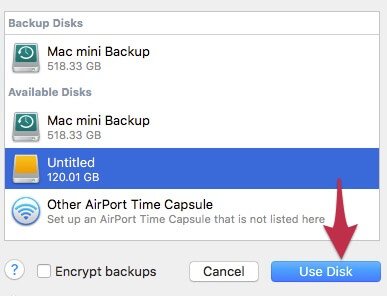
Time Machine will now start backing up the Mac for you and will keep the backup up to date as long as the backup drive is plugged in.
FEATURED PRODUCTS
Featured Product

0333 023 0001.

