
A big shout out to the wonderful Stuart of @Tekeez_IT who has renamed my website to marialalic.cymru If like me you are an IT numpty, I can't recommend them too highly.


Keeping a regular backup of the data on your computer and mobile device is one of the most important things that you can do. This protects you against losing any of your photos, music or documents in the event that anything happens to your computer or if any of your files get accidentally deleted.
Both Windows and Mac have great backup systems built in and they're very easy to set up. The first thing you'll need is a new or empty USB external hard drive, when that's plugged into your computer, just follow the steps below.
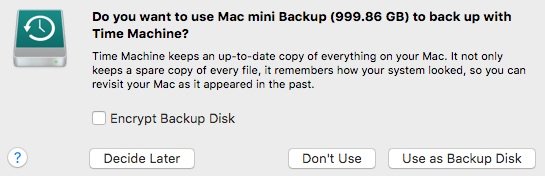
The first time you plug in a new external drive it should ask you if you want to use it for Time Machine, simply click on Use as Backup Disk and the Mac will prepare the drive and start your first backup for you.
If you're not asked when you plug the drive in, just follow the steps below to set up the hourly Time Machine backup on your Mac.
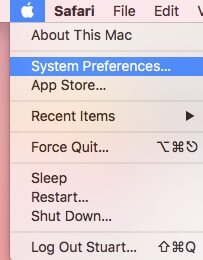
Click on the Apple Menu at the top left of the screen and then click on System Preferences.
Once the System Preferences window is open, click on the Time Machine icon.

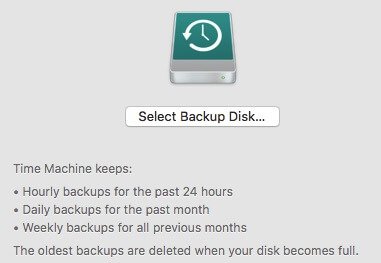
Once Time Machine is open, click on Select Backup Disk...
You'll now see a list of all the available drives connected to your Mac, in this example we're going to choose the disk called Untitled. Simply click on the disk and then click on Use Disk.
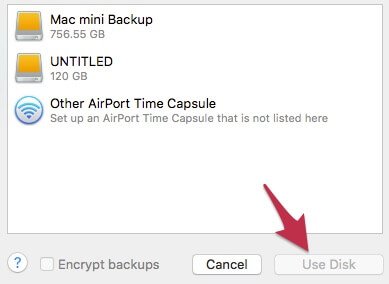
Because this disk is currently set up to work with Windows (as most external hard disks will be) the Mac needs to format the disk to get it ready for Time Machine. Please ensure there is nothing on this disk that you need as it will be lost when it's formatted. When you're happy that the disk can be wiped, please click on Erase.

As soon as the disk is ready, you'll see the following window confirming that the disk is set up and the first backup will start in around 2 minutes.
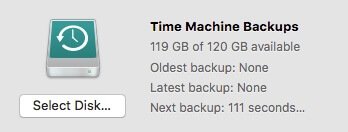
Once this is set up, the Mac will back up every hour and keep all your data safe.
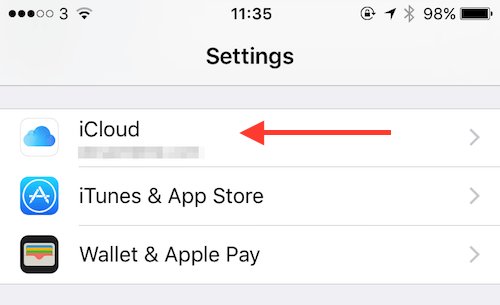
Tap on the Settings icon on the home screen and then scroll down to iCloud and tap there.
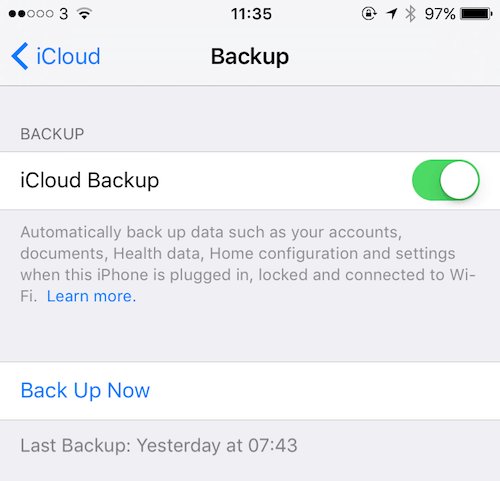
Once you're in the iCloud settings, scroll down to the Backup option and tap.
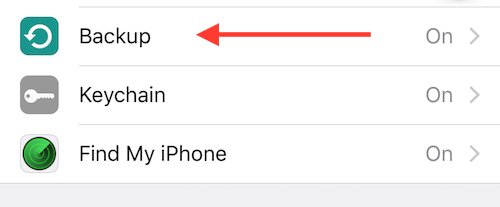
Ensure that iCloud backup is switched on, if it's already on then your data is safe on Apple's iCloud servers and you can check the last backup date at the bottom of the screen and start a new backup by tapping on Back Up Now.
Both Windows and Mac have great backup systems built in and they're very easy to set up. The first thing you'll need is a new or empty USB external hard drive, when that's plugged into your computer, just follow the steps below.
Windows 10
Simply click into the search bar and type in backup, now click on the File History settings.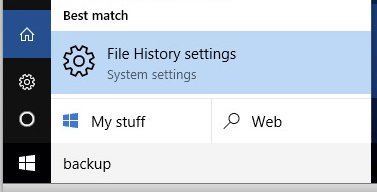
You'll now be asked to select the drive you want to back up to, so click on Add a drive.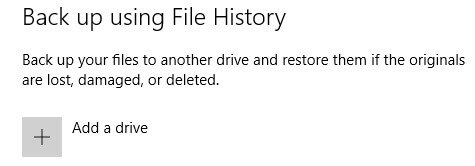 Windows will now display a list of the drives that are suitable for backing up to, please ensure that you choose the correct drive if more than one appear. In this case, we'll select the E drive.
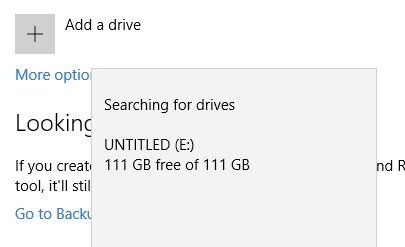
You're now all set, Windows will backup your files every hour as long as the backup disk is plugged into the PC, if you do disconnect the drive from the PC, it will catch up with the backups the next times it's connected.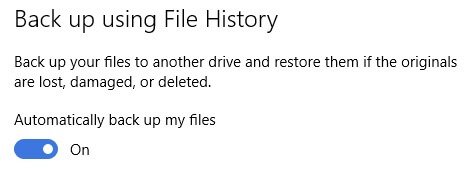
Mac OS
The first time you plug in a new external drive it should ask you if you want to use it for Time Machine, simply click on Use as Backup Disk and the Mac will prepare the drive and start your first backup for you.If you're not asked when you plug the drive in, just follow the steps below to set up the hourly Time Machine backup on your Mac.
Click on the Apple Menu at the top left of the screen and then click on System Preferences.
Once the System Preferences window is open, click on the Time Machine icon.
Once Time Machine is open, click on Select Backup Disk...
You'll now see a list of all the available drives connected to your Mac, in this example we're going to choose the disk called Untitled. Simply click on the disk and then click on Use Disk.
Because this disk is currently set up to work with Windows (as most external hard disks will be) the Mac needs to format the disk to get it ready for Time Machine. Please ensure there is nothing on this disk that you need as it will be lost when it's formatted. When you're happy that the disk can be wiped, please click on Erase.
As soon as the disk is ready, you'll see the following window confirming that the disk is set up and the first backup will start in around 2 minutes.
Once this is set up, the Mac will back up every hour and keep all your data safe.
iOS
On your iPhone or iPad, you can automatically back up to Apple's iCloud service and keep all your apps, photos and other information safe. This should be switched on automatically if you're logged into an iCloud account, but to check simply follow the steps below.Tap on the Settings icon on the home screen and then scroll down to iCloud and tap there.
Once you're in the iCloud settings, scroll down to the Backup option and tap.
Ensure that iCloud backup is switched on, if it's already on then your data is safe on Apple's iCloud servers and you can check the last backup date at the bottom of the screen and start a new backup by tapping on Back Up Now.
FEATURED PRODUCTS


Featured Product
Why not follow us?


Tekeez support both PC/Windows users and Mac users equally, so whether you have a Mac or a PC we can help.
Tekeez are proud to have been providing legendary IT Superhero services and support for 30 years, since 1994.
Why not try our services and discover the secret of our success?


© 1994-2026 EuroSolve Ltd - Tekeez® is a registered trademark and brand of EuroSolve Ltd
0333 023 0001.
0333 023 0001.
Tekeez® Caerphilly:
Britannia House • Caerphilly Business Park • Van Road • Caerphilly • CF83 3GG
Tekeez® Oxford:
Prama House • 267 Banbury Road • Oxford • OX2 7HT