

That’s great we are all set up using the emails.
Amazing service thank you.

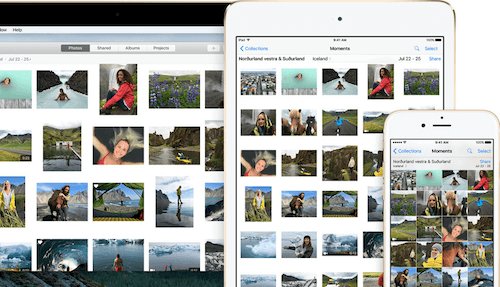
If you enjoy taking photos and storing them on your computer or mobile device, you have access to a lot of free software that can help you enhance, resize and otherwise edit your photos. Basic software for doing this is built into Windows, macOS and iOS and we'll show you how to get started with it here.
Windows 10
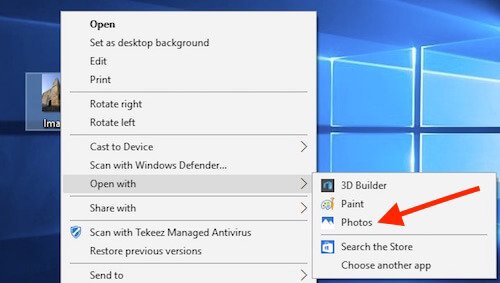
You can use the Photos app included with Windows 10 to apply filters and effects, change the colour, crop and retouch your images. The first step is to find the photo you want to edit, right click on it and select open with Photos.
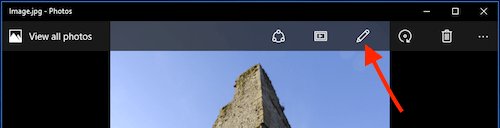
You can now click on the Edit button at the top of Photos to bring up all the editing tools.
You now have a selection of editing tools down the left hand side. As you click through these options the available effects on the right hand side will change.
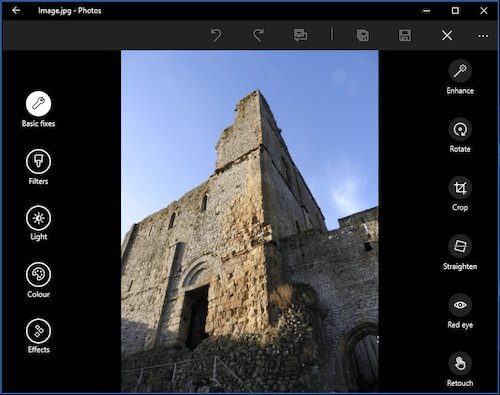
The Basic fixes option is usually the first stop for editing photos and would allow you to straighten any wonky photos, crop the picture to include only what you wanted and to retouch it to smudge out any unwanted parts of the picture.
Any changes you make can be undone using the undo arrow at the top of the screen. You also have options to save the picture over the original and save a copy if you want to keep the original untouched.

macOS
The process is very similar on macOS, the first step is to import your photo into the Photos app (this will usually happen automatically when you connect your camera to your Mac) then double click on the photo you want to edit and click on the Edit button at the top right of Photos, the Photos window will go black to indicate that you're in edit mode.

You now have access to tools to enhance, rotate, crop/straighten, adjust the light and colour as well as apply filters and retouch the photo.
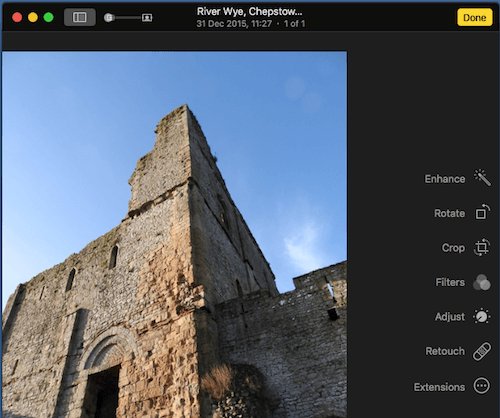
When you've finished editing your photo, simply click on Done at the top right of the window and you'll be back to viewing your edited photo.

If you change your mind after you've edited a photo, you can go back into Editing mode and click on the Revert to original button and this will remove all the edits made to your photo.
 iOS
iOS
You can make all the same edits to photos on your iPhone or iPad using a very similar process to the above.
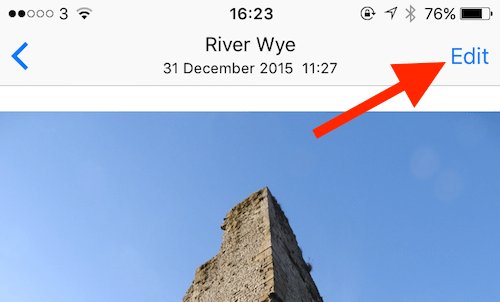
First, open the Photos app and you'll see all your photos on your device.
Tap on the photo that you want to edit and tap on Edit.
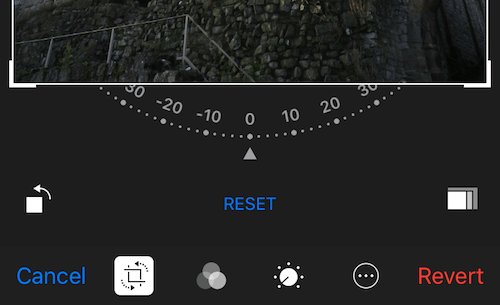
You'll now see all the options along the bottom of the screen. If you've chosen the wrong photo, just tap on Cancel.

The first editing option allows you to crop and/or straighten the photo. If you took the photo on your iPhone then Photos will attempt to straighten the photo for you.
The second option allows you to apply filters to the photo.
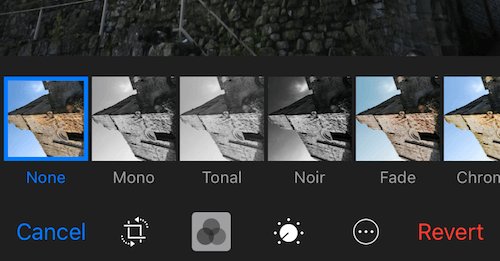
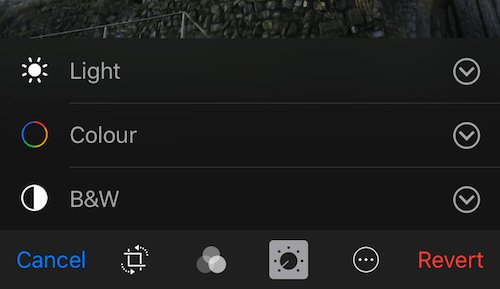
The third option allows you to alter the light and colour.
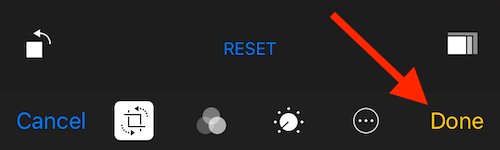
When you're happy with your edit in a particular section, tap on Done. You can now go and apply edits from the other options as well.
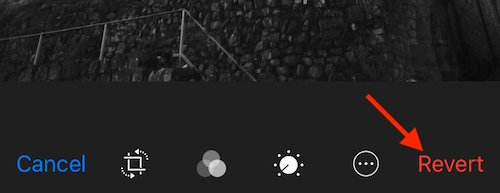
If you change your mind about your edits, go back into Edit mode and tap on the Revert option at the bottom of the screen and it will remove all the edits for you.
Windows 10
You can use the Photos app included with Windows 10 to apply filters and effects, change the colour, crop and retouch your images. The first step is to find the photo you want to edit, right click on it and select open with Photos.
You can now click on the Edit button at the top of Photos to bring up all the editing tools.
You now have a selection of editing tools down the left hand side. As you click through these options the available effects on the right hand side will change.
The Basic fixes option is usually the first stop for editing photos and would allow you to straighten any wonky photos, crop the picture to include only what you wanted and to retouch it to smudge out any unwanted parts of the picture.
Any changes you make can be undone using the undo arrow at the top of the screen. You also have options to save the picture over the original and save a copy if you want to keep the original untouched.
macOS
The process is very similar on macOS, the first step is to import your photo into the Photos app (this will usually happen automatically when you connect your camera to your Mac) then double click on the photo you want to edit and click on the Edit button at the top right of Photos, the Photos window will go black to indicate that you're in edit mode.
You now have access to tools to enhance, rotate, crop/straighten, adjust the light and colour as well as apply filters and retouch the photo.
When you've finished editing your photo, simply click on Done at the top right of the window and you'll be back to viewing your edited photo.
If you change your mind after you've edited a photo, you can go back into Editing mode and click on the Revert to original button and this will remove all the edits made to your photo.
iOSYou can make all the same edits to photos on your iPhone or iPad using a very similar process to the above.
First, open the Photos app and you'll see all your photos on your device.
Tap on the photo that you want to edit and tap on Edit.
You'll now see all the options along the bottom of the screen. If you've chosen the wrong photo, just tap on Cancel.
The first editing option allows you to crop and/or straighten the photo. If you took the photo on your iPhone then Photos will attempt to straighten the photo for you.
The second option allows you to apply filters to the photo.
The third option allows you to alter the light and colour.
When you're happy with your edit in a particular section, tap on Done. You can now go and apply edits from the other options as well.
If you change your mind about your edits, go back into Edit mode and tap on the Revert option at the bottom of the screen and it will remove all the edits for you.
FEATURED PRODUCTS


Featured Product

Why not follow us?


Tekeez support both PC/Windows users and Mac users equally, so whether you have a Mac or a PC we can help.
Tekeez are proud to have been providing legendary IT Superhero services and support for 30 years, since 1994.
Why not try our services and discover the secret of our success?


© 1994-2026 EuroSolve Ltd - Tekeez® is a registered trademark and brand of EuroSolve Ltd
0333 023 0001.
0333 023 0001.
Tekeez® Oxford:
Prama House • 267 Banbury Road • Oxford • OX2 7HT
Tekeez® Caerphilly:
Britannia House • Caerphilly Business Park • Van Road • Caerphilly • CF83 3GG