

As always, a swift solution - and at a reasonable price. Many thanks!

If you're sending photos or PDFs to people it can be very helpful to add your own annotations, whether it's to give someone directions or point something out in the photo. This is very easy to do using Preview on the Mac and below we'll show you how to do it.
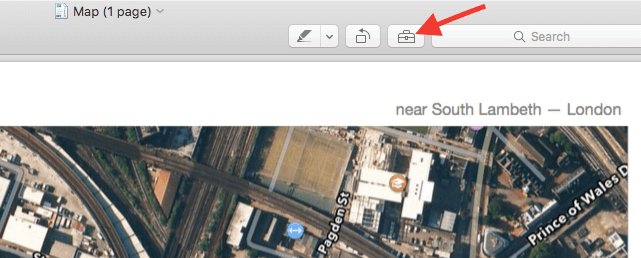
First of all, open the PDF or photo that you want to annotate in Preview and then click on the Show Markup Toolbar button as shown below.
You'll now have access to several tools for annotating the file, these include adding text, sketching and drawing on the file, adding shapes and even adding your signature.
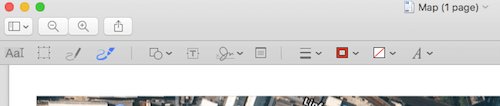
The sketch tool is especially useful as it will let you draw arrows, shapes etc and will then turn your sketch into a proper arrow or shape.
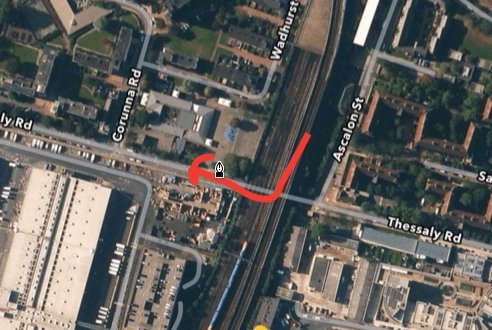
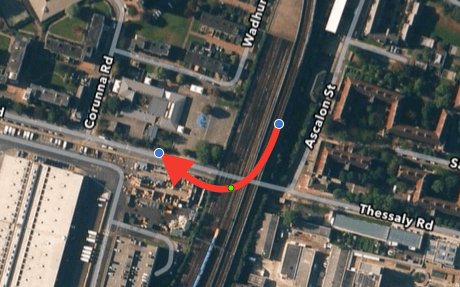
If you'd prefer a more freehand approach to drawing your directions then use the drawing option and you can draw freehand on the file.
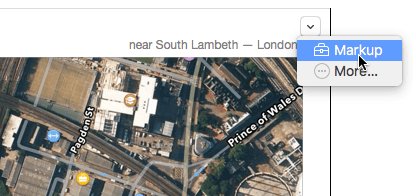
If you're sending a file to someone via email, then all these options are available to you once you've attached the file to the email, simply move your mouse pointer to the top right of the attachment, click on the box with the arrow in and click on Markup. You'll then see all the same options as above and you can edit the file directly in the email.
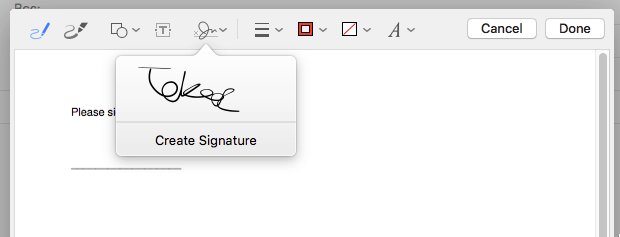
One really helpful feature is the ability to add a signature to a PDF so if you've been sent something that you would usually print out and sign, you can just add your signature straight onto the PDF.
Once you're annotating the PDF, click on the Signature option and if you don't already have a signature set up, click on Create Signature, you can then sign directly on the trackpad or scan a signature in from a piece of paper using your webcam.
Once you have your signature stored, you can just click on it to drop it onto the PDF, you can then resize it and move around to get it in the right place.
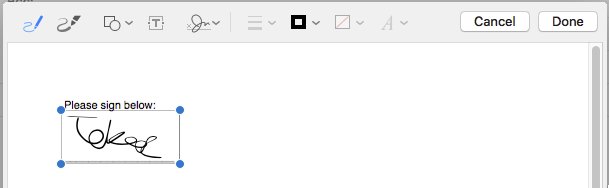
Once you've placed the signature in the correct place, just click on Done at the top right and you'll have a PDF with a signature ready to go.
First of all, open the PDF or photo that you want to annotate in Preview and then click on the Show Markup Toolbar button as shown below.
You'll now have access to several tools for annotating the file, these include adding text, sketching and drawing on the file, adding shapes and even adding your signature.
The sketch tool is especially useful as it will let you draw arrows, shapes etc and will then turn your sketch into a proper arrow or shape.
If you'd prefer a more freehand approach to drawing your directions then use the drawing option and you can draw freehand on the file.
If you're sending a file to someone via email, then all these options are available to you once you've attached the file to the email, simply move your mouse pointer to the top right of the attachment, click on the box with the arrow in and click on Markup. You'll then see all the same options as above and you can edit the file directly in the email.
One really helpful feature is the ability to add a signature to a PDF so if you've been sent something that you would usually print out and sign, you can just add your signature straight onto the PDF.
Once you're annotating the PDF, click on the Signature option and if you don't already have a signature set up, click on Create Signature, you can then sign directly on the trackpad or scan a signature in from a piece of paper using your webcam.
Once you have your signature stored, you can just click on it to drop it onto the PDF, you can then resize it and move around to get it in the right place.
Once you've placed the signature in the correct place, just click on Done at the top right and you'll have a PDF with a signature ready to go.
FEATURED PRODUCTS


Featured Product
Why not follow us?


Tekeez support both PC/Windows users and Mac users equally, so whether you have a Mac or a PC we can help.
Tekeez are proud to have been providing legendary IT Superhero services and support for 30 years, since 1994.
Why not try our services and discover the secret of our success?


© 1994-2026 EuroSolve Ltd - Tekeez® is a registered trademark and brand of EuroSolve Ltd
0333 023 0001.
0333 023 0001.
Tekeez® Oxford:
Prama House • 267 Banbury Road • Oxford • OX2 7HT
Tekeez® Caerphilly:
Britannia House • Caerphilly Business Park • Van Road • Caerphilly • CF83 3GG